


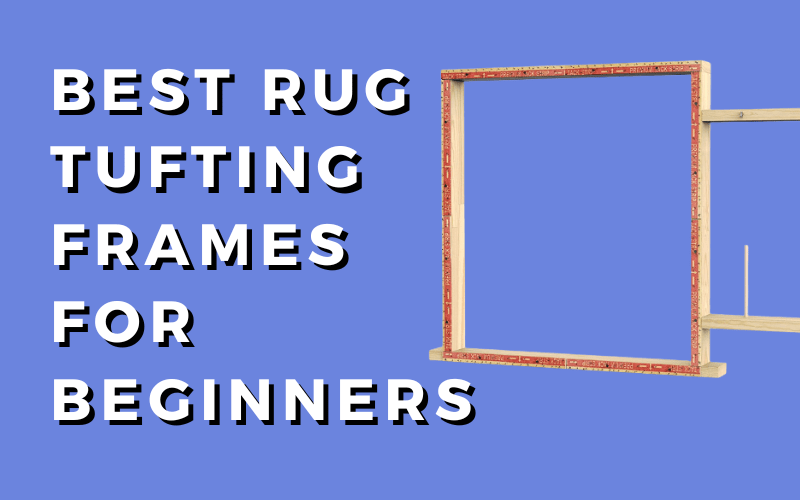
How To Make A Rug Tufting Frame
Home / How To Make A Rug Tufting Frame
Table of Contents
Share This Post
Building Your Own Sturdy and Efficient Tufting Frame
Rug tufting, once a niche craft, has captured the hearts of artists and DIY enthusiasts alike, gaining tremendous popularity in recent years.
The art of tufting allows individuals to transform ordinary yarns into stunning rugs, showcasing their creativity and adding warmth to any space.
While mastering tufting techniques is crucial, one often overlooked aspect is the indispensable role of a sturdy and efficient tufting frame.
A well-constructed frame provides the necessary support and tension control, ensuring consistent and professional results.
In this blog, we aim to guide you through the process of creating your own rug tufting frame, empowering you to embark on your rug-making journey with confidence and precision.
Imagine the satisfaction of crafting a masterpiece from threads, a rug that is a reflection of your artistic vision.
Rug tufting, once a well-kept secret, has become a beloved art form, captivating countless individuals who seek to create beauty from the simplest of materials.
However, amidst the excitement of designing patterns and selecting yarns, it is easy to overlook the crucial foundation that underpins the entire process: a sturdy and efficient tufting frame.
A strong frame ensures that your rug remains taut, allowing you to focus on the intricate tufting work with precision and ease.
In this blog, we are delighted to share a comprehensive step-by-step guide on building your own rug tufting frame.
Prepare to unleash your creativity and embark on an artistic journey where every stitch is supported by the solid structure you create.
If you’d like to skip this entire process you can do so by purchasing a rug tufting frame online.
All The Materials You'll Need To Get Started Building The Rug Tufting Frame
Embarking on the journey of building your own rug tufting frame is an exciting endeavor.
Before you dive into construction, it’s essential to gather the necessary materials and tools.
Each item plays a significant role in creating a reliable frame that will support your rug-making process.
In this section, we will explore the essential materials needed for constructing a sturdy frame, highlighting their significance, and suggest optional materials for adding a touch of personalization to your project.
Building a rug tufting frame requires careful consideration of the materials and tools you’ll need to bring your vision to life.
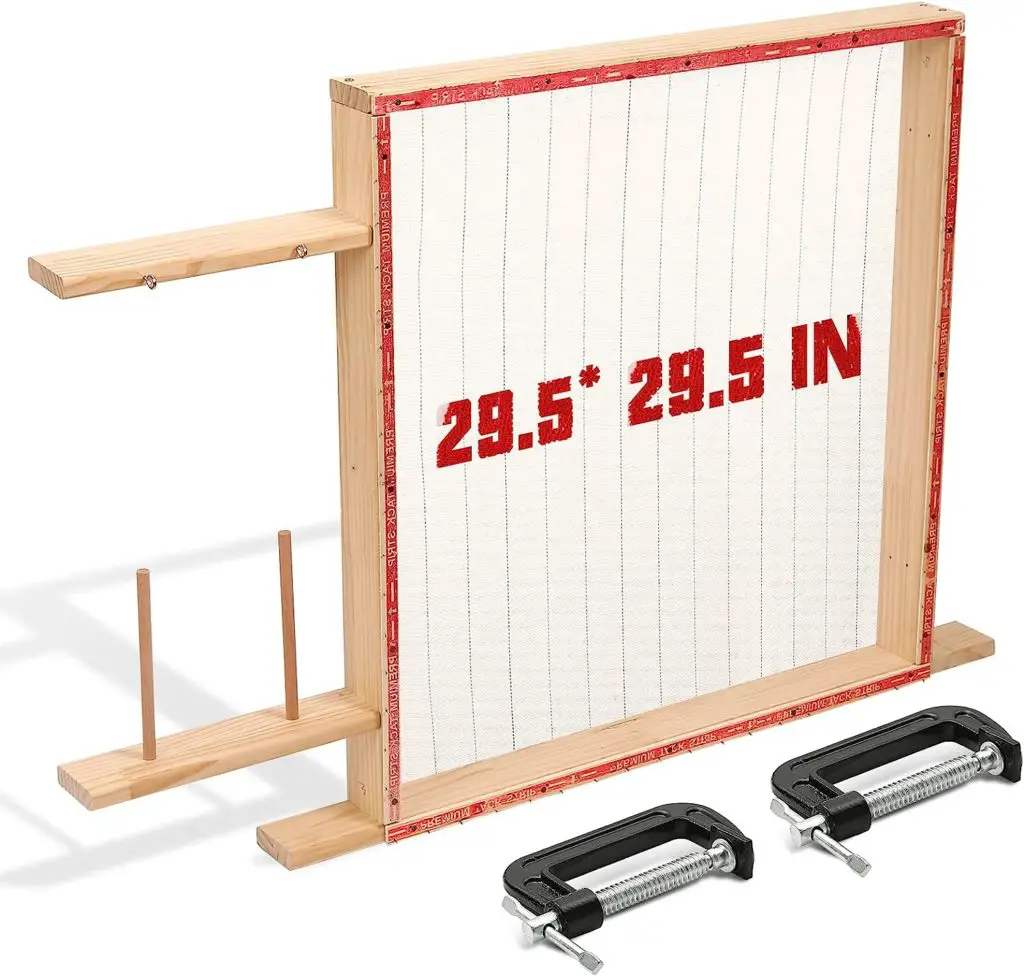
Let’s begin with the foundation: Choose a high-quality, sturdy wood that can withstand the tension and weight of your rug. Typically, 2×4 or 2×6 boards work well, providing the necessary strength and stability.
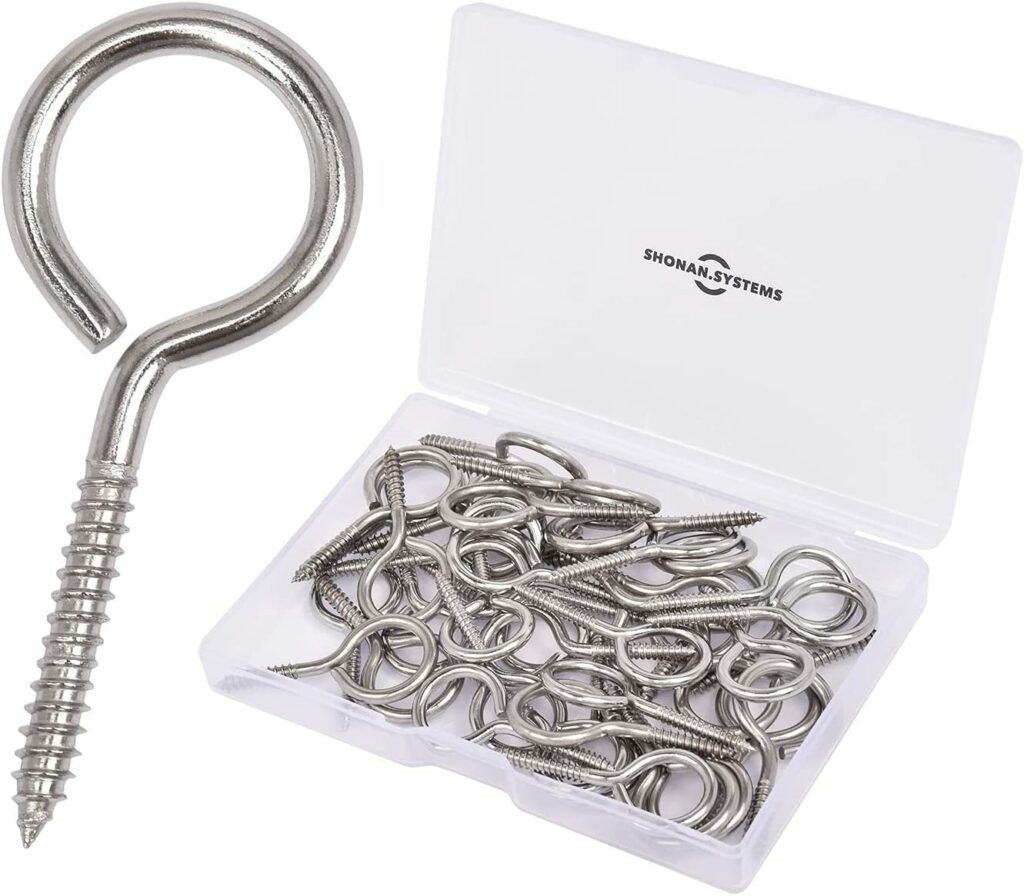
You’ll also want a small 2×1 of wood to attach to the side of your frame with 2 screwable eye hooks to use for when feeding your yarn into your rug tufting gun.
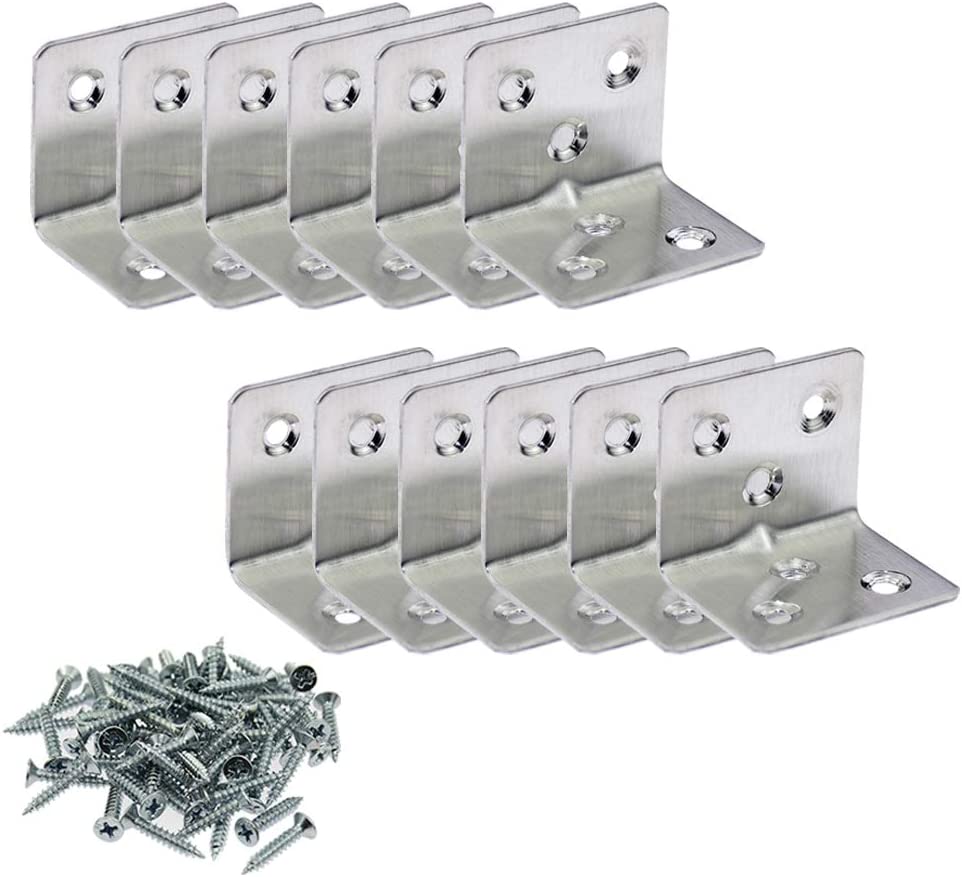
Wood Screws will be your trusty companions, securing the frame’s components together. Opt for durable screws that can handle the pressure without loosening over time. Additionally for extra support you’re going to want to pick up at least 4 Corner Braces to add to the inner corners of the frame, and optionally another 4 to add on the outside of the frame.
Tack strips or Nails that are cut with pliers to get a sharp edge to hold your cloth down when tufting.
A drill is indispensable for making precise holes that you will drill into the wood to create pilot holes so the wood does not split and attaching the lumber securely.
Remember to have a measuring tape on hand to ensure accurate dimensions, allowing for a frame that perfectly suits your rug size.
Additionally, a saw will come in handy for cutting the lumber to the desired lengths and angles. The saw isn’t required as your local hardware store will be able to help you cut your wood down to the perfect sizes.
Now, let’s consider customization. If you wish to add a personal touch, consider optional materials such as paint or stain to enhance the frame’s aesthetics. These can transform your frame into a true work of art, reflecting your unique style and creativity.
Designing Your Ideal Rug Tufting Frame
As you embark on the journey of creating your own rug tufting frame, one of the critical considerations is the design.
The design of your frame will determine its stability, versatility, and overall ease of use.
In this section, we’ll explore different design options, such as rectangular, square, or adjustable frames.
We’ll discuss the importance of measurements and dimensions, considering both personal preferences and the size requirements of your rugs.
Additionally, we’ll delve into the pros and cons of each design choice, highlighting the factors that contribute to stability and the ultimate success of your rug-making endeavors.
Designing the frame for your rug tufting project is akin to laying the groundwork for a masterpiece.
There are several design options to consider, each with its unique benefits and considerations.
The most common designs include rectangular, square, and adjustable frames. A rectangular frame offers simplicity and straightforward construction.
It provides a stable and secure structure, ideal for rugs of various sizes. On the other hand, a square frame offers symmetry and balance, which can be particularly appealing for smaller rugs or artistic creations.
If you desire versatility and the ability to accommodate rugs of different dimensions, an adjustable frame might be your ideal choice.
This design allows for easy adjustments in width and height, providing flexibility to work on rugs of varying sizes. When determining the measurements and dimensions of your frame, consider both your personal preferences and the size requirements of your rugs.
Aim for a frame that allows ample space for maneuvering while ensuring stability throughout the tufting process.
By prioritizing stability and ease of use in your design, you’ll set yourself up for success as you bring your rug tufting dreams to life.
Constructing Your Rug Tufting Frame with Precision
Now that you’ve decided on the design of your rug tufting frame, it’s time to roll up your sleeves and bring it to life.
The construction process is where your vision takes shape, and the frame becomes a sturdy foundation for your rug-making endeavors.
In this section, we’ll guide you through the step-by-step process of constructing the frame, starting with the base and proceeding to attach the side and end pieces.
We’ll explore the use of screws, drills, and essential tips to ensure a sturdy and level frame.
By following these instructions, you’ll create a reliable frame that will support your rug tufting journey with stability and precision.
Constructing the frame for your rug tufting project is an exciting phase, as you transform raw materials into a solid structure ready to showcase your artistic talents.
Let’s begin with the base, the foundation of your frame.
Start by cutting the lumber to the desired length and width according to your chosen design.
Take precise measurements, using a measuring tape, to ensure accuracy.
Once you have your base, assemble it by securely attaching the side and end pieces.
Utilize screws and a drill for this task, ensuring a firm connection that can withstand the tension and pressure exerted during rug tufting.
To guarantee the sturdiness and levelness of your frame, it’s essential to double-check each joint and ensure that all pieces are tightly fastened.
If needed, consider adding additional support, such as corner brackets or cross braces, to reinforce the structure.
By taking these precautions, you’ll create a frame that provides the stability and balance necessary for an enjoyable and successful rug tufting experience.
Adding Adjustable Features to Your Rug Tufting Frame
As you embark on constructing your rug tufting frame, consider the option of adding adjustable features to enhance its versatility.
Adjustable frames provide the flexibility to accommodate rugs of varying sizes or cater to personal preferences.
In this section, we’ll explore the process of incorporating mechanisms like hinges or brackets to create adjustability.
We’ll also discuss how to create adjustable legs or height options to meet specific rug size requirements.
Additionally, we’ll provide guidance on reinforcing these adjustable parts to ensure durability and stability throughout your rug tufting journey.
Customization is the key to creating a rug tufting frame that perfectly suits your needs.
By adding adjustable features to your frame, you gain the ability to adapt to different rug sizes and create a comfortable working environment.
If your chosen design allows for adjustability, consider incorporating mechanisms like hinges or brackets.
Hinges can be used to create an adjustable angle, allowing you to tilt the frame to a position that is most comfortable for your tufting process. Brackets provide an excellent option for adjusting the width or height of the frame, accommodating rugs of varying sizes.
Creating adjustable legs or height options is another way to ensure your frame meets your specific needs.
This can be achieved by using extendable legs or adding removable inserts to adjust the frame’s height.
To ensure the durability and stability of these adjustable parts, it’s crucial to reinforce them.
Use sturdy materials and reinforce joints with additional screws or support brackets.
By incorporating these adjustable features and reinforcing them properly, you’ll have a rug tufting frame that offers unparalleled flexibility and stands the test of time.
Adding Finishing Touches to Your Rug Tufting Frame
As you near the completion of constructing your rug tufting frame, it’s time to add those final touches that elevate both the aesthetics and functionality of your creation.
In this section, we’ll delve into the importance of sanding the frame to ensure a smooth surface, free from rough edges or splinters.
We’ll also discuss the benefits of applying a protective finish, such as varnish or paint, to enhance the longevity of your frame and add a personal touch to its appearance.
Furthermore, we’ll explore the possibilities of personalization through decorative elements or branding, allowing you to infuse your frame with your unique style and make it truly your own.
Congratulations on reaching the final phase of building your rug tufting frame! Before you put it to use, let’s take a moment to focus on those finishing touches that will make your frame truly shine.
First and foremost, it’s essential to sand the frame to ensure a smooth and comfortable working surface.
Pay close attention to any rough edges or splinters, as these can be bothersome during the rug tufting process.
Sanding will not only provide a more enjoyable experience but also help protect your yarn and fabric from snagging or damage.
Once the frame is sanded, consider applying a protective finish, such as varnish or paint.
A protective finish serves multiple purposes: it enhances the longevity of your frame by shielding it from moisture and wear, and it also adds a touch of visual appeal.
Choose a finish that aligns with your aesthetic preferences and complements the overall style of your workspace.
Additionally, don’t be afraid to infuse your frame with personalization. Add decorative elements, such as stencils, decals, or even custom branding, to make the frame uniquely yours.
Let your imagination run wild and transform your frame into a true reflection of your artistic spirit.
With these finishing touches, your rug tufting frame will not only be functional but also a beautiful work of art in its own right.
Testing Your Rug Tufting Frame for Success
As you near the final stage of preparing your rug tufting frame, it’s crucial to thoroughly test its stability and functionality.
Testing the frame before embarking on your rug-making project ensures a smooth and confident tufting experience.
In this section, we’ll explore the significance of testing the frame, providing guidelines on how to set it up correctly and securely hold the fabric or canvas.
We’ll also offer tips on adjusting tension or angles to achieve the desired tufting experience. By conducting thorough tests, you’ll ensure that your frame is ready to support your creative journey and yield remarkable results.
Before you dive into the exciting world of rug tufting, it’s vital to subject your frame to rigorous testing.
This step serves multiple purposes, all contributing to a smooth and successful tufting experience. Begin by setting up the frame correctly, ensuring that it is stable and level.
Securely attach the fabric or canvas to the frame, making sure it is taut and evenly stretched.
This will provide the necessary foundation for precise and controlled tufting. Once the fabric is in place, take a moment to assess the frame’s ability to hold the tension.
Gently apply pressure to various sections of the fabric, checking for any signs of sagging or instability.
Make necessary adjustments to reinforce weak spots or tighten the frame if needed.
Experiment with different tension levels or angles to find what works best for you, allowing for comfortable and controlled tufting.
Remember, the testing phase is an opportunity to familiarize yourself with the frame’s capabilities and make any necessary adjustments to ensure a seamless and enjoyable rug tufting process.
With a solid foundation in place, you’ll embark on your creative journey with confidence, ready to transform threads into beautiful works of art.
Preserving Your Rug Tufting Investment, Maintenance and Storage Tips for Your Frame
As you wrap up your rug tufting projects, it’s important to ensure the longevity and performance of your frame through proper maintenance and storage.
Taking care of your frame will not only extend its lifespan but also guarantee optimal performance for future rug-making endeavors.
In this section, we’ll provide valuable advice on cleaning and maintaining your frame to keep it in top shape. We’ll also discuss storage options to safeguard the frame from damage when it’s not in use.
Additionally, we’ll suggest additional accessories or tools that can enhance your rug tufting experience, allowing you to take your craft to new heights.
Congratulations on completing your rug tufting projects!
Now, let’s shift our focus to the maintenance and storage of your invaluable frame.
To ensure optimal performance and longevity, it’s essential to keep your frame clean and well-maintained. Regularly inspect the frame for any signs of wear or damage, such as loose screws or weak joints.
Tighten any loose parts promptly and consider applying lubricant to hinges or adjustable mechanisms to maintain smooth functionality.
If your frame accumulates dust or debris, use a soft cloth or a gentle cleaning solution to wipe it clean, paying special attention to areas where fabric or yarn comes into contact with the frame.
When it comes to storage, aim to protect your frame from potential damage. Consider disassembling the frame if space permits, carefully storing each component separately to prevent unnecessary stress or warping.
If disassembling is not feasible, cover the frame with a protective cloth or sheet to shield it from dust and accidental damage.
Finally, to enhance your rug tufting experience, consider investing in additional accessories or tools.
A comfortable seat cushion, adjustable lighting, or specialized tufting tools can elevate your craft and make the process even more enjoyable.
By implementing these maintenance and storage practices and exploring new tools, your rug tufting frame will continue to serve as a reliable companion for countless future creations.
The Power of Your Own Rug Tufting Frame
As we come to the end of this blog, it’s time to reflect on the importance of a well-constructed rug tufting frame and the incredible journey you’ve embarked upon.
Throughout this guide, we’ve emphasized the significance of a sturdy and efficient frame in achieving successful rug-making projects.
By creating your own frame, tailored to your individual needs and preferences, you’ve unlocked a world of possibilities.
The satisfaction of building something with your own hands and infusing it with your unique style cannot be understated.
Now equipped with your newly built frame, it’s time to start your rug tufting journey with confidence, knowing that you have a reliable companion to support your creativity.
As we reach the conclusion of this guide, we’re reminded of the pivotal role a well-constructed rug tufting frame plays in the success of our projects.
A solid frame provides stability, precision, and a comfortable working environment—elements that are crucial for achieving remarkable results.
By investing time and effort in building your own frame, you’ve taken a significant step towards creating a fulfilling rug tufting experience.
The ability to customize the frame to your specific needs is a powerful tool that unlocks a world of creative possibilities.
As you embark on this journey, remember the satisfaction of crafting something unique, tailored to your individual preferences.
Let your imagination run wild, experiment with different techniques, and embrace the joy of bringing your artistic visions to life.
With your newly built frame as your steadfast companion, the only limit is your creativity.
If you’d like a rug tufting frame to be build for you we at WeRugTuft would be more than happy to work with you to get one built. Just email us directly at [email protected]
So, step forward with confidence and let the magic of rug tufting unfold before your eyes.
Table of Contents


We Rug Tuft
July 27, 2023